Saturday, April 17, 2010

Maloof Inspired Rocker, Charles Brock Plans 3

Last weekend I went over to my friends shop to use his Harbor Freight lathe, well, it had died. Apparently the motor had given up on its short, dubious quality life. Unfortunately for me I didn't know anyone else locally that has a lathe and I needed to turn the front legs for my rocker, so I did what any woodworker would do, I bought myself one, I mean, I really did need it to complete this project, really. So I went over to The WoodWhisperer's Amazon store because it really is a painless way to support a great site and to keep Marc able to keep supplying us with fantastic videos.

Once the turning was complete, and I was covered it Walnut chips, the front legs looked great in place and the chair is starting to look like a chair. Now onto the back legs, probably the most difficult part of the build so far. After creating the tapering jig that Mr. Brock describes in the book, I tapered the adder blocks on the rear legs to give the proper splay.


Then I cut the tenons on the table saw and rounded the inside corner on the router table. After a little fitting and fine tuning with my small router plane and some paring with a chisel the back legs fit nice and tight with just the right amount of splay.


With both rear legs in place and the front legs on it's really looking like a chair, tomorrow I'll drill some holes to attach the legs. Mr. Brock calls for a Miller stepped bit for the attachments of the front and rear legs, and also the headrest. I have some more cutting to do on the rear legs on the bandsaw and a little more shaping to do on the seat.
You'll notice the Rockler Bench cookies on my table, I've found these perfect for holding the coopered seat for shaping, in the DVD Mr. Brock uses what looks like a cradle custom made to hold the seat, but since I'm just making the one chair making a special jig to hold the seat seemed like overkill to me. I simply place the cookies on the table and set the seat on them, the cookies hold the seat securely when shaping and sanding. Next week, the arms, wish me luck.
"When a man is wrapped up in himself, he makes a pretty small package."
- John Ruskin

Sunday, April 11, 2010

Maloof Inspired Rocker, Charles Brock Plans, 2

This weekend I worked on the seat, the front legs, and the back legs. I also rewatched the DVD yet again, it really is an invaluable tool. The first thing I did was to dust off my biscuit joiner and look all around the shop, I know I had some biscuits around here somewhere. In the DVD Mr. Brock uses Dominoes but he does suggest that you could use biscuits or dowels, they really are just to align the coopered seat. After checking seat for size I used a plane to trim off a few hundreds of an inch off of each of the ends. Once I was happy with everything I measured and marked for the joinery and cut it on the tablesaw. Using the 1/2 inch slotting bit that Mr. Brock recommends I trimmed the tenons for the legs. I trimmed excess material from the seat using the bandsaw then, using plenty of glue, clamped it up.
While the seat was cooking I picked some nicely figured Walnut for the front legs and cut them to size. Mr. Brock's instructions for laying out the mortises for the front legs were very easy to follow. I cut them to size then adjusted the fit with a router plane. Once this was complete I used the provided template to mark the front legs and cut the waste away on the bandsaw.
Once I took the seat out of the clamps the fun started, using an angle grinder and a Galahad carving wheel, I carved out the seat to a shape I liked then refined it with with a sanding wheel, a micro plane, and finally worked my way to 60 grit sandpaper on my Festool sander. I have to say that I never thought much about sanders until I got to use this unit with it's attached vacuum, does a better, cleaner job that any sander I've ever used, I have some DeWalt random orbit sanders that I used to attach to my shopvac, but it doesn't compare. I wanted to see how the seat was going to look so I splashed some mineral spirits on it and WOW!, it is beautiful.
The next thing I did was to select a board for the back legs and rough cut, then trimmed them out on the bandsaw, following this I attached the pattern and cleaned them up on the router table. The instructions call for an adder block to be glued to the inside of each leg, this was the last thing I did this weekend, stay tuned for more updates. Oh a last note, Charles Brock picked up my last post and linked it from his website! Unfortunately somehow my "about me" section had gotten turned off so he had no idea what my name was, and at the end of my post I added a quote from Douglas Adams, but I didn't put quotation marks around it, so, Mr. Brock called me Doug..., well, who really cares, I'm just psyched that he picked up my post.
"Always be wary of any helpful item that weighs less than its operating manual."
Terry Pratchett

Thursday, April 8, 2010

Maloof inspired Rocker, Charles Brock plans

This post begins my journey into the world of sculpted rocking chairs. I've been wanting to attempt one of these for a few years but the passing of Sam Maloof last year and the release of Charles Brock's book/plan/dvd have pushed me to give it a go. I won't give a step by step instruction on what it takes to create one of these beauties such as the example of one of Mr. Brock's chair to the left, this is best left to his book/plan/DVD, instead I'll just keep you up with what I'm doing and how it's going as well as commenting on the Book itself.

I received "Build a Maloof Inspired Rocker" book/dvd/plan bundle for Christmas this year and was struck by the quality of the product, the book is well written and clear, the DVD is professionally produced and Mr. Brock does a great job showing each step in creating the rocker as well as giving helpful hint and tips throughout. The plans are full size 2x4 foot sheets that give you every template that you need to build the rocker. Mr. Brock is quick to tell you that he did not attempt to reproduce an exact replica of the Maloof rocker but was inspired by Mr. Maloof's body of work and wanted to create one himself. His methods are much easier to follow that the Hal Taylor downloadable book which I also have. After my first watching of the DVD I was confident that I could create a passable chair. I suggest that you watch the DVD all the way through and look through the book, then when you are planning your build, use the DVD and book together chapter by chapter.

The first thing that I did was to make a copy of the template plans at Staples just in case I messed up on cutting the templates, I did this also so that I could keep an archival copy of the plans for future builds.

After collecting the appropriate thicknesses of plywood and MDF plus some posterboard I cut out the templates and using artists spray adhesive adhered the paper to the wood and cut it out of the bandsaw then cleaned each up using the oscillating spindle sander and various files and sanding blocks. I also made the bending form for the rockers. The book has detailed instructions on creating each template and form and what thickness plywood to use for which template.


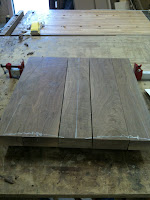
Following Mr. Brock's recommendation for BF I had ordered a stock of 8/4 Black Walnut and it have been acclimating in my shop for 3 months, today I cut, jointed and coopered the seat per his instruction.

I also ordered the router bits that he suggests in the book and DVD for shaping the joints for the leg/seat connection as none of the ones in my collection match in radius, this is the key to getting tight fitting joints on both the front and back legs.

This weekend I plan to rewatch the seat chapter again while following along in the book and then going to the shop to begin the joinery on the seat and start the shaping. More updates to come.

I may not have gone where I intended to go, but I think I have ended up where I needed to be.
- Douglas Adams